Print Smarter & Better Leverage Your Office Technology.
Whether you are looking for leading printing devices or modern software solutions, we have affordable, cutting-edge options that will streamline workflows and boost productivity.
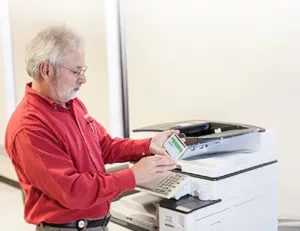
As technology evolves, businesses must advance as well to ensure they remain competitive in their market. But keeping up with the most effective tech doesn’t need to be cost prohibitive. Whether you are in need of a multifunction printer, copier, or specialty printer, our devices can help your company be more efficient. We also offer innovative software and specialized programs to help optimize your business processes
We look forward to learning about your company’s unique needs to help match you with the right technology.
Affordable Technology. Customized Solutions.
Give us a call for a free assessment.
Technology Partners

Google Reviews
Here’s what our happy customers had to say about our services:
- JACK JONES
Our service Guy Billy Thompson is amazing. he takes customer care to a new level. I wish I had a dozen Billy's working for me. C.A Readings service over all... read more

- Sergio Suarez
Michael Z fixed our printer in no time 👍
- Trek Imaging
The customer service we receive from Paul Taniguchi has been nothing but the best. He's dependable and full of knowledge that we highly respect, value and trust. He goes above... read more
- David Imirian
Bill is the man and Lolo is awesome
- Customer Service
Great service from CA Reding, and Paul knows his stuff!
- Juan Roman
I recently had the pleasure of experiencing top-notch service from Michael Brown for my printer, and I couldn't be more pleased with the results. Michael's professionalism, technical expertise, and commitment... read more
- Brenda G
Our 4th lease renewal for the office copier went very smoothly. Our last-minute change requests were handled promptly. We've had C.A. Reding handle our copier service for 12... read more
- Jeff Goschen
CA Redding has done an excellent job of handing our multiple companies very complex and demanding needs. Our expanding multiple state network of stores CARedding is right on top... read more
- Duncan Hanon
Paul Taniguchi and Ricoh are amazing to work with. Professional, knowledgeable, helpful, and efficient.
- Mailman
Nothing but Excellence! Paul has been incredible to work with! Thanks for everything!